Basic ESXi configuration
For this you’ll need a windows machine to run the VI-Client (although you can do most of it from the command line, this will be much easier via the client if you’re just starting with ESXi). As as alternate method, you could download the vCenter Linux Appliance in evaluation mode and run it as a local virtual machine using Fusion or something else locally. Then you would manage the ESXi server with this machine and you can use the web interface from your browser to do the configuration. I would recommend doing this at some point anyway in order to get access to some of the features reserved for ESXi 5.5 like the latest VM versions for running OS X VMs.
At this stage, you’ll be talking directly to your ESXi server across the internet, so the first thing to do will be to set the root password to something horribly complicated (which you will then note in your password manager or some other secured storage).
The basic steps of getting the client and changing the root password can be found here.
The networking configuration is a little specific to this kind of all in one configuration. We start with the default vSwitch where we have the ESXi management port setup with its internet facing IP address.
First off, we need a new vSwitch to plug our VMs into. For this, we go to Configuration > Networking > Add Networking… Select “Create a vSphere standard switch” with no physical adaptors selected (it’s already allocated to the default switch anyway) and in the next screen, call it LAN with the default VLAN ID.
Now we have two virtual switches, one connected to the ethernet card, connected to the internet and one connected to nothing at all for the moment.
For the beginning storage, we’ll just format the internal drives as individual datastores. This is done under Configuration > Storage > Add Storage…, selecting Disk/LUN as the storage type.
Here you may run into problems if the disks were previously formatted by another OS. Refer to this note if this happens. Accept the defaults and name the volumes however you like. I went with the exceedingly unoriginal SSD and HDD.
Bootstrap your first virtual machines
To get started we have a bit of a chicken and egg situation. To install your first virtual machines, you’ll need an ISO image. Now if this machine were on the local LAN, it would be fairly easy to just map an ISO image from the machine you’re using to run the VI-Client. However, if you’re like me, your DSL upstream speed is pretty awful (~100KB/s) so interactively reading from a local disk is going to be really really slow.
So to get around this, we’ll go back to the ESXi command line via SSH. You’ll need to activate ssh and the shell under Configuration > Security Profile. On the Services section, click the Properties button to get the list of services. From there, select the ESXi Shell, Options and Start. Do the same for SSH.
Now we can open a terminal session and use
ssh root@From here we can navigate to our VMFS volume :
cd /vmfs/volumes/SSD
mkdir sources
cd sources
wget http://files.nyi.pfsense.org/mirror/downloads/pfSense-LiveCD-2.1-RELEASE-amd64.iso.gz
Installing the pfSense VM
To create pfSense VM, we’ll start in the VM client or web interface and create a custom VM. There’s a great instruction page on the pfSense website, so I’m not going to repeat all of that. The key things that I’ve done in my configuration is named the interfaces for the virtual machines as follows :
-
WAN
-
LAN
To correspond with the pfSense naming conventions. Actually, I went a little further and have added another subnet called DMZ to separate my internal machines and services from internet facing stuff. Again, in this case, there is a separate vSwitch with a separate named connection associated. Unlike the configuration explained on the pfSense site, these vSwitches have no physical adapters associated with them.
Basic pfSense configuration
pfSense is a complete firewall solution and as such can be configured in many different ways. You can either work from the principle that we let everything through, and then block off places where we don’t want to go, or we can do the opposite and block everything by default and open up ports selectively.
Getting the VPN running
Setting up an IPsec VPN can be a bit of a pain, but on most modern systems it’s not too bad as long as you pay attention to making sure you have selected exactly the same settings on both sides. In fact the biggest problem with getting IPsec working is that there is no industry standard UI implementation that shows the same form structure to fill out so it’s easy to get various settings mixed up.
I found the Cisco RV180 to be a perfect fit for my use here. It can handle site to site VPN, some basic internal VLAN stuff and is quite inexpensive for the feature set. In France, it sells on Amazon for 109 € and in the US it’s priced at $108. There is also a version that includes wireless capability but since I already have my wifi setup using an Airport Extreme and various Expresses for extension and Airplay I went with the simple model.
Side note: If you’re currently replacing something like an Airport Extreme for your local wireless networking, you can just plug it into the back of the RV180 and set it to bridge mode so that it’s no longer routing, just offering wireless services.
So the architecture looks like this:
And here’s the configuration that’s running:
pfSense:
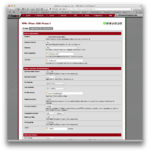
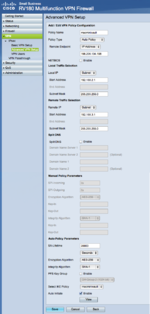
Cisco RV180:
Once you have this up and running, any machines on your local network should be able to route to the LAN subnet on the hosted machine and vice-versa. This makes it a transparent extension of your current network.
Routing changes
Now that we have a firewall and a solid VPN connection running, it’s a good idea to make a few more little changes to ensure that your ESXi server isn’t hanging out exposed directly to the internet.
First off, we can shutdown the SSH and ESXi shell in the Configuration > Security Profile > Services section.
Now the only exposed ports are the standar ESXi management ports. You can manually adjust the exposed ports firewall rules so that they only accept connections from your network in the ESXi configuration. But this means that if you need to connect to your server while you’re one the road, you’ll be blocked. So my approach is to add another vKernel Management interface on the internal LAN interface, and then use the LAN gateway as the default route. The net result of this configuration is that the server can only be accessed from machines either on the LAN subnet behind the pfSense or your home/office network that is connected via the VPN. Then I add a VPN service that I can connect to from my other machines while on the road.
I leave the original vKernel management port installed just in case something catastrophic goes wrong and I can get the hosting provider to reset the default gateway at the console to get remote access working via the internet.
Automatic boot
Now that we have set things up this way, there’s no way back in from the internet if the host ESXi machine reboots. So to get around this problem we need to make sure that the pfSense VM automatically starts up when the host starts.
This is configured in Configuration > Virtual Machine Startup/Shutdown. It’s just a matter of editing the list so that the pfSense VM is the first machine in the list to boot automatically when the ESXi server starts up. This is mostly an additional protection since ESXi is a remarkably stable environment so the only reason this should come into play is when you want to upgrade the ESXi itself.
Next Up : Loopback ZFS storage


