I’ve been using the Veeam feature of a scale-out repository that leverages S3 storage for offsite and long term retention for a while. One of the interesting variants on this option is the ability to leverage the S3 object lock feature which basically tells the system that whatever happens, an object that is written cannot be deleted for a fixed amount of time, generally 15-30 days in our use case. This type of WORM feature is becoming a necessary tool in restoring from ransomware/cryptolocker attacks, especially since the attackers are getting smart and go looking for the backup systems and try to compromise them as well. So if you’re depending on your backups to help you and you don’t have some method of getting them offline or making them inaccessible, you have another risk to protect against.
Veeam has solutions for many sizes of environments. If you have a small setup, the advent of huge hard drives makes it possible to use the rotating media option where you swap out some big hard drives attached to your backup server where it makes a copy and you keep one in a safe or offsite.
Of course, there’s always the tried and true standby of tapes, but the problem with both of these systems is that they depend on unreliable people to swap drives and tapes and generally be on top of things. I’m paranoid about having my data protected and yet every single one of my plans that involved having me swap a hard disk or a tape on a regular cycle inevitably fell into failure.
There are a few options that are certified to work with Veeam’s S3 cloud tier repositories with object locking, like Backblaze and of course AWS. Backblaze is particularly interesting as they go head to head with Wasabi on pricing and beat them to market with the object lock option which is expected shortly from Wasabi.
But there are still environments where online backups just don’t work for a variety of reasons, from data caps, slow internet connections, organisational inability to buy anything without a purchase order and so on. For these places we still need some kind of on premises solution (hopefully on a secondary site or at least another building). In recent times there has been an explosion in S3 and other object storage solutions, but many of these are designed for scale far beyond what most small and medium sized businesses need, especially if it’s just a dedicated extra copy of their backups.
If you are in a company that has Linux competencies, then the answer is pretty easy: MinIO. It’s easy to setup and has the advantage over many of the object storage solutions in that it can scale down as easily as it scales up. The drawbacks are that you have to have some level of comfort in building this yourself, and then maintaining the servers (physical or virtual), keeping them up to date and so on. And securing them properly since they are potentially the last line of defence - it would be a shame if an ssh brute-force attack got to the console and did an rm -Rf on the data directly.
Which is what brings me back to TrueNAS now that 2FA is included which means that getting to the console just got significantly harder. With this approach you can build a physical or virtual appliance that only exposes ports 443 for the administration and another port for the S3 interface.
Step-by-step, TrueNAS, MinIO, Veeam
TrueNAS
I’m going to skip the installation, pool creation and so on as that is well documented in lots of other places and just go straight to the specifics for preparing and hardening the configuration.
System > General
Web Interface HTTP -> HTTPS Redirect should be enabled to prevent password sniffing on the wire. Once we get the 2FA enabled that should render knowledge of the password less useful, but still, no point in making things easy.
Optionally, restrict HTTPS to TLSv1.3 while you’re here in this tab.
System > Advanced
You are sending your syslogs to a SIEM or log reporting tool somewhere, right?
System > 2FA
Click on the Enable Two-Factor Authentication. Immediately after, click on the Show QR button and scan it with your 2FA application. At this stage it would also be a good idea to print the QR code and stick it in a safe just in case you lose access to the phone and need to register with another app or phone.
MinIO
Here’s where things can get complicated. In order to use the object lock feature with MinIO, you need to have the versioning option enabled. In order to enable versioning you need multiple “disks” defined as storage destinations for MinIO. The built-in version of MinIO that you can activate via the Services UI in TrueNAS only uses one, which if fine if you just want a regular object store but not for our intended use case. In order to tweak the configuration a little bit, we need to use the MinIO Plugin.
Plugins
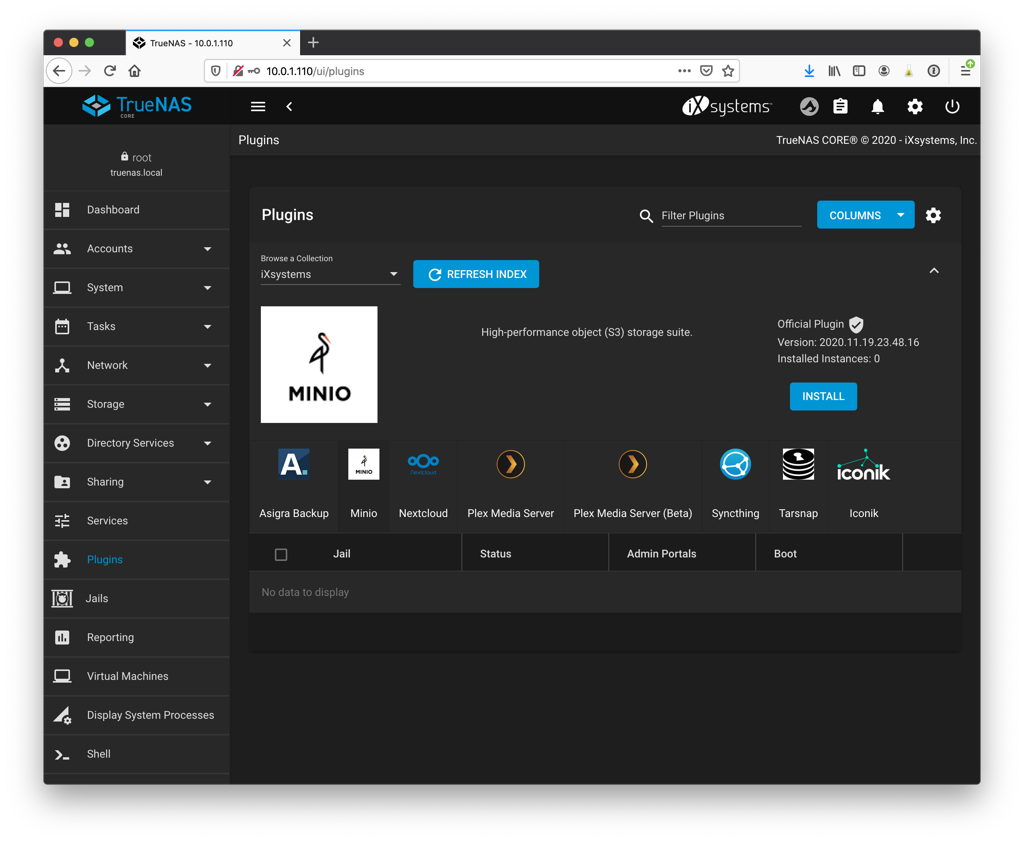
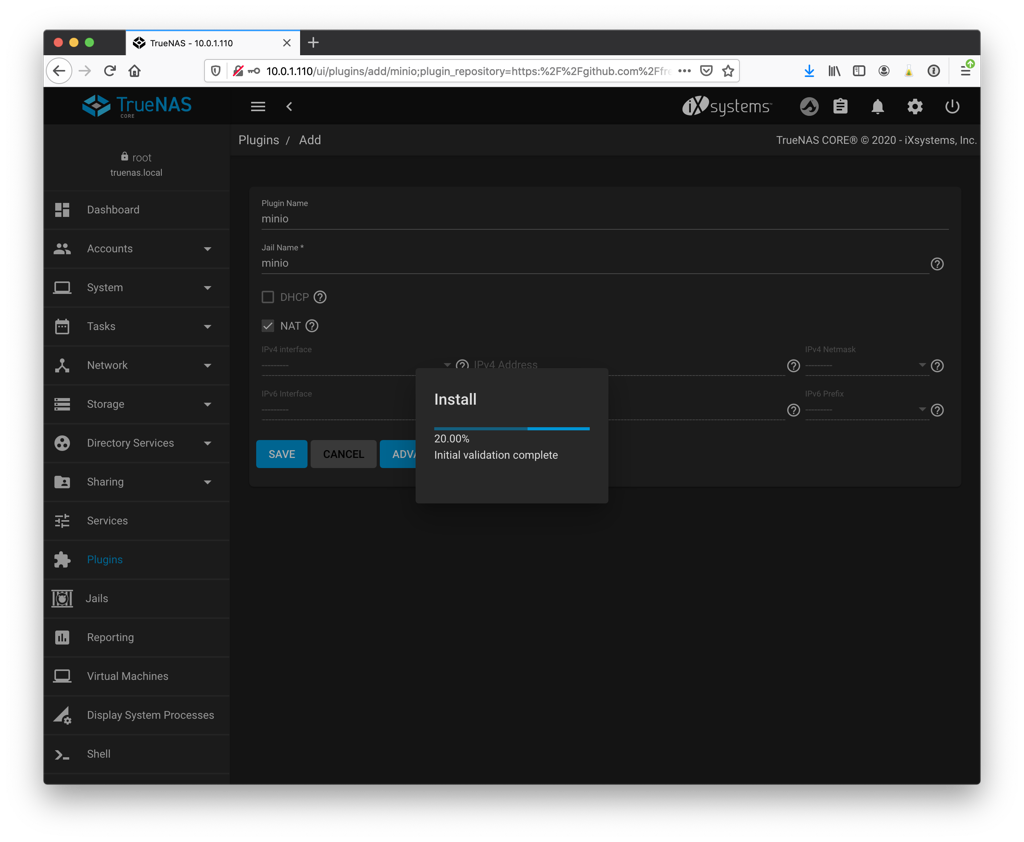
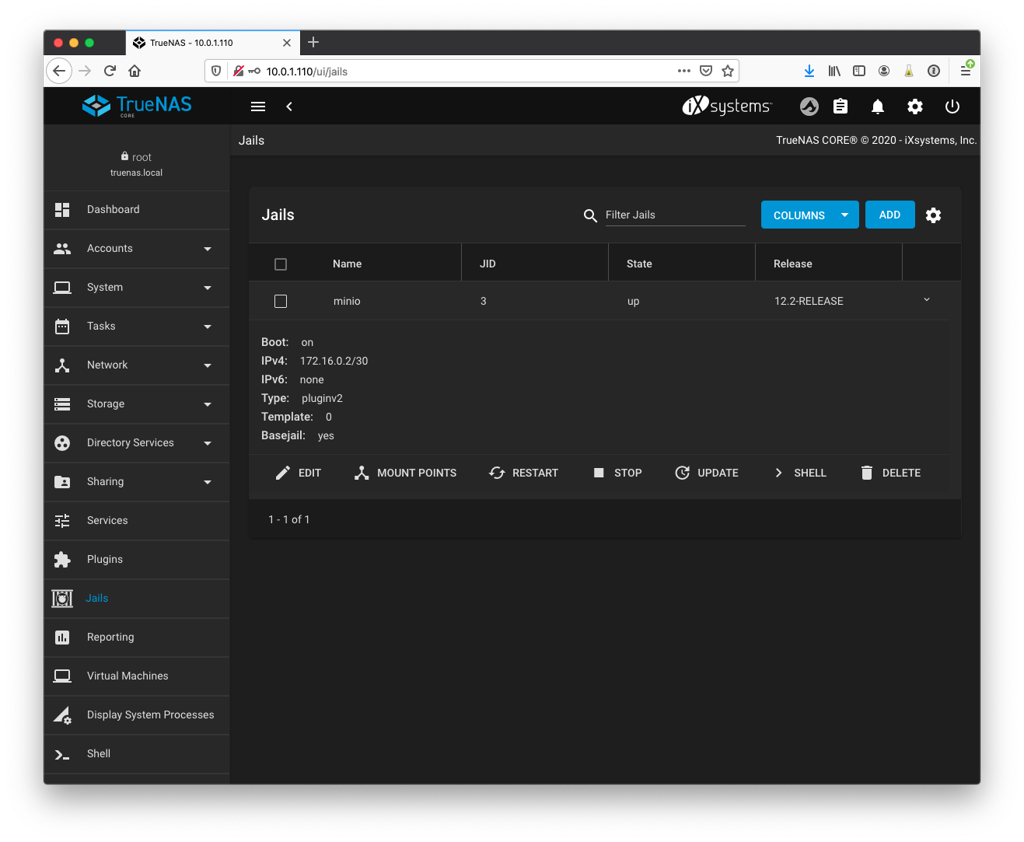
Select MinIO from the horizontal list of iXsystems plugins and click Install. You’ll need to give your plug-in instance and the associated jail instance names. At this point, you can choose how you want the networking to be setup.
You can use the same ethernet card as the management interface and it will setup a NAT tunnel to the jail, or you can manually select another available interface and define the IP address that you want to use. This would be useful if you are installing this on a physical server where you can isolate the s3 traffic to a VLAN that is shared only with the Veeam server.
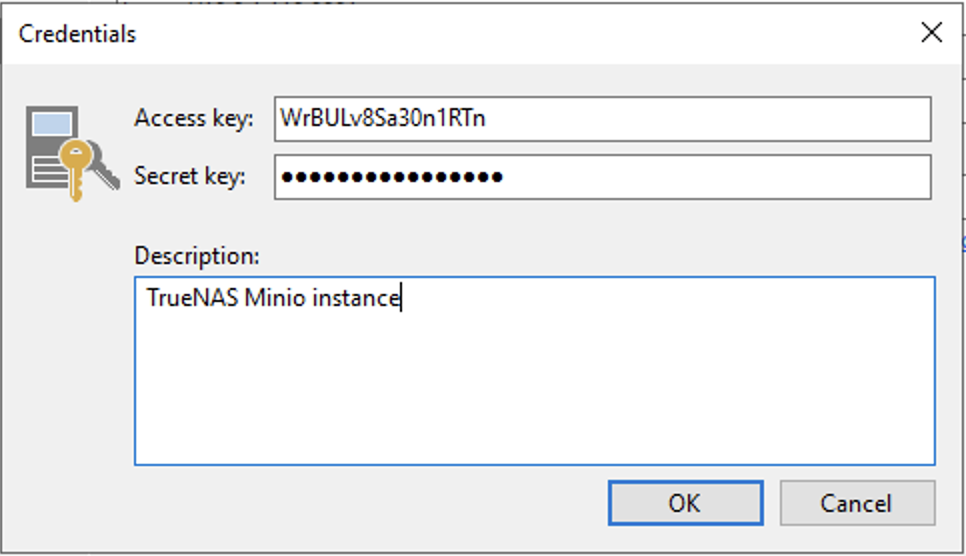
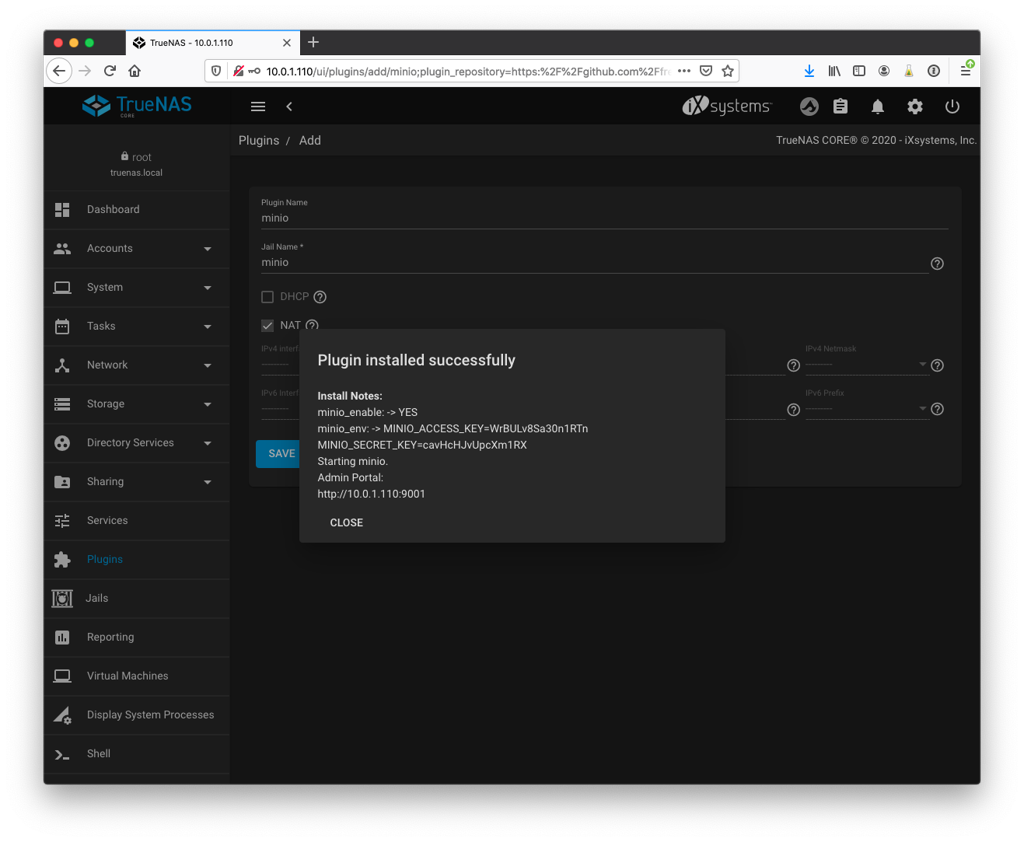
Once the plugin has been installed and the jail created, it will display the randomly generated access and secret keys. Note these down.
Then we go to jail and turn it off by clicking the Stop button so we can modify it.
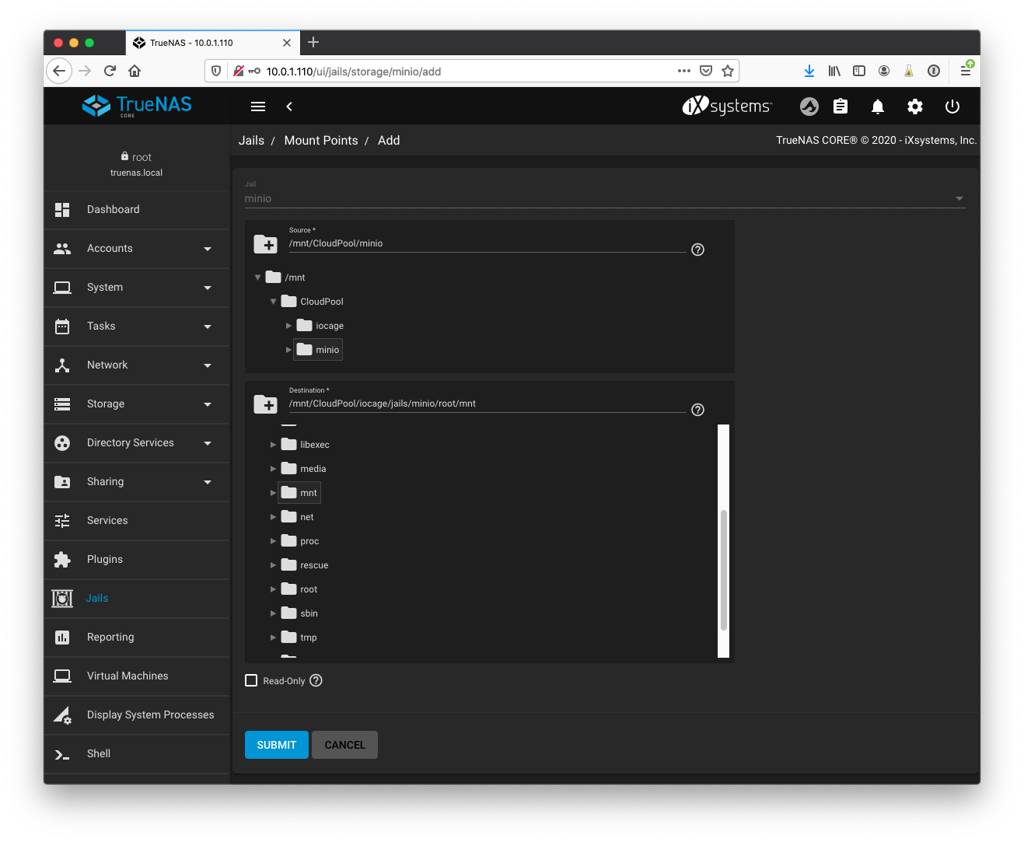
Now we need to give the jail some storage to work with. This is where things get complicated. Since we’re going to be using the versioning which requires erasure coding it means that we’re going to define a number of places where MinIO will distribute the data. The easiest method is to simply present a ZFS dataset to the jail and then create a number of folders which will be used by MinIO as separate destinations. Of course, this is all being protected by whatever RAID level you have put on your zpool so it’s redundant since MinIO is basically doing a RAID across these folders as well which will end up taking more space. It will work but just be aware that it’s non-optimal.
If you’re looking for a properly designed setup for maximum efficiency and performance, you should have at least 4 zpools and present a dataset from each of them to the jail and map them to individual folders under /mnt (they don’t have to be under /mnt, but it’s always a useful shortcut to let you know that it’s data that comes from somewhere else). Don’t forget that you’ll also need a pool for storing the jail as well. But if you’re just building a simple system out of a 4 disk raidz zpool, just map a single dataset and be done with it.
Now we start up the jail so that we can start interacting with it.
If you’re working from a single dataset, we need to create some directories for MinIO to use as an erasure coding set. You can open a session to the console shell of the jail in the Jail configuration and from there create 4 directories and change the owner to the MinIO account:
mkdir /mnt/data1 /mnt/data2 /mnt/data3 /mnt/data4
chown -R MinIO /mnt
Now we need to explain to MinIO to use these as separate disks by adding the following line at the end of /etc/rc.conf (still within the jail):
minio_disks="/mnt/data1 /mnt/data2 /mnt/data3 /mnt/data4"
Note: MinIO often uses a shell expansion trick in their documentation like “/mnt/data{1…4}, but for some reason I couldn’t get that to work in the jail.
If you restart the jail at this point, you will now have a fully functional object storage system that you can browse, create buckets and so on. If you attached a network card to the jail, it will be published on port 9000, and if you used NAT, it will be on port 9001 (for the first instance anyway).
However, if you try to create a Cloud Tier repository from Veeam at this stage it will tell you quickly that it requires HTTPS.
SSL
For this you’ll need to create a private key, a certificate and make them available to MinIO. Assuming that you don’t have an internal CA already, the following options should do the trick, updating the subject section to something appropriate:
cd /usr/local/etc/minio/certs
openssl ecparam -genkey -name prime256v1 | openssl ec -out private.key
openssl req -new -x509 -days 3650 -key private.key -out public.crt -subj "/C=US/ST=state/L=location/O=organization/CN=<domain.com>"
chown minio private.key public.crt
Object Lock
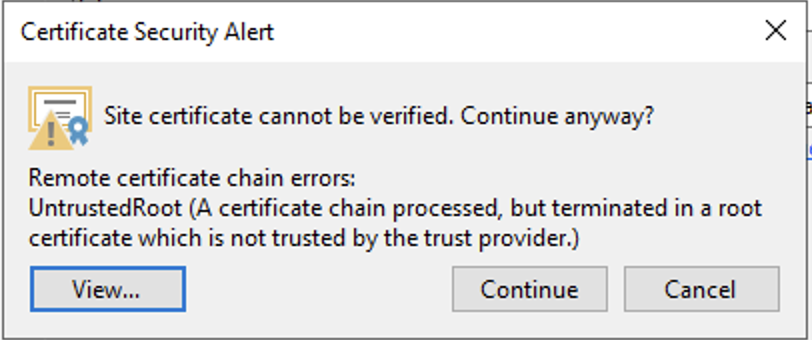
Now we restart the jail and we have an object store published using TLS. The final step is to create a bucket that has the object lock option enabled. The easiest method is to use the MinIO client “mc”, installed on your workstation or the Veeam server. The “insecure” option is required to allow for self-signed certificates, but is still an encrypted connection.
First off you’ll want to create an alias for connecting to the new object store :
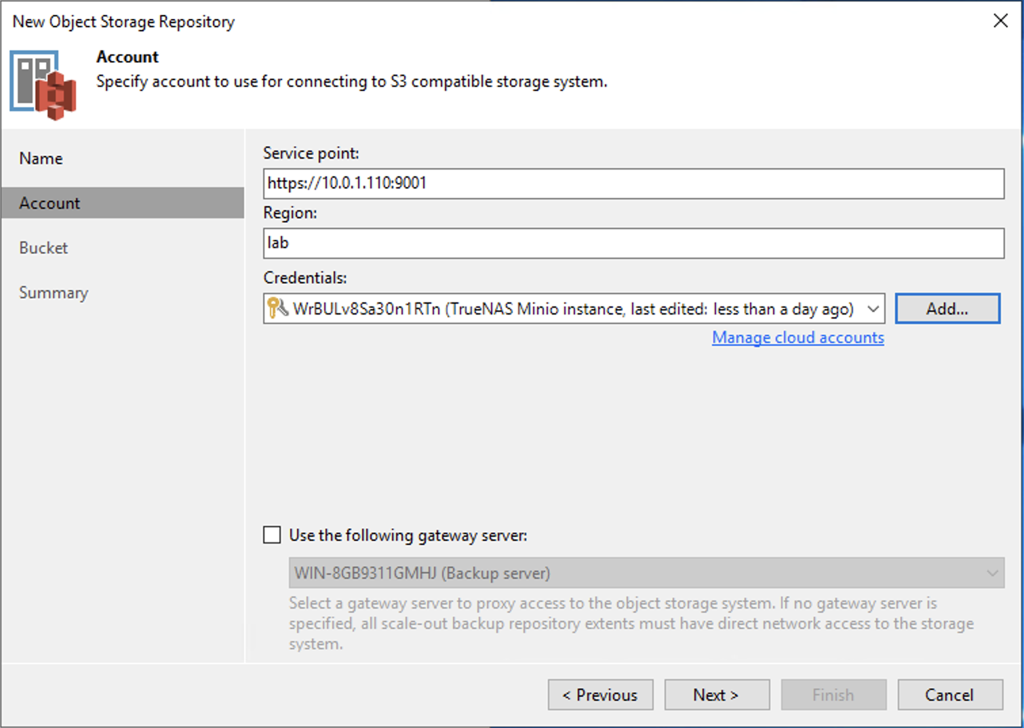
mc alias set minioveeam https://<server>:9001 <access key> <secret key> --insecure
Then we use the alias to create a new bucket with the object lock feature enabled:
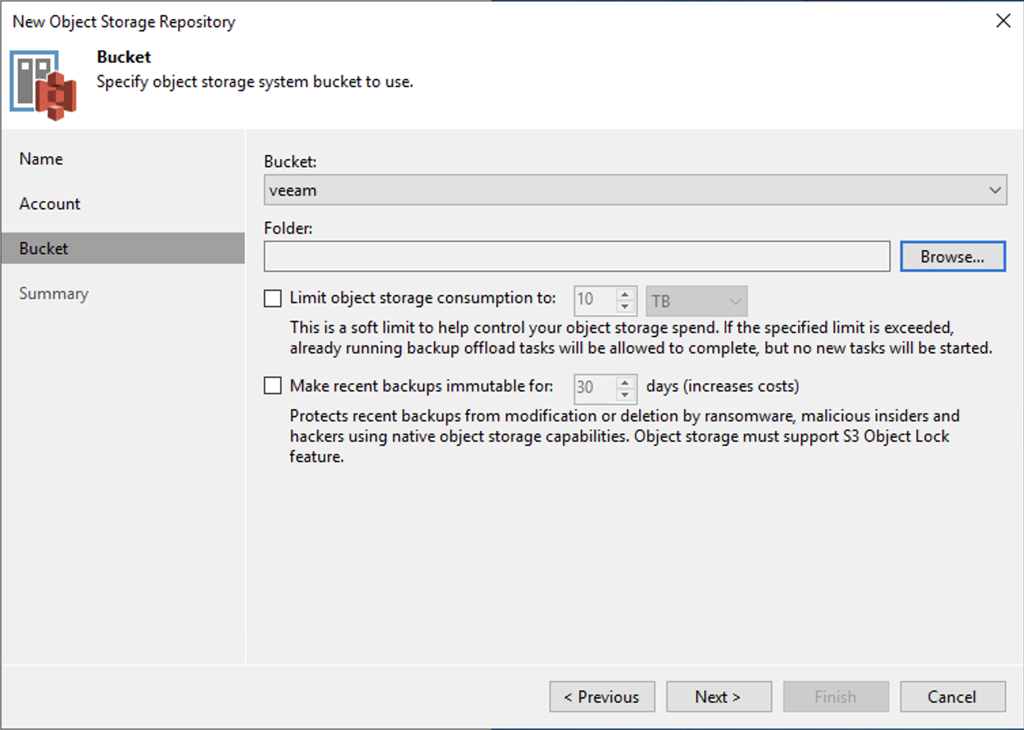
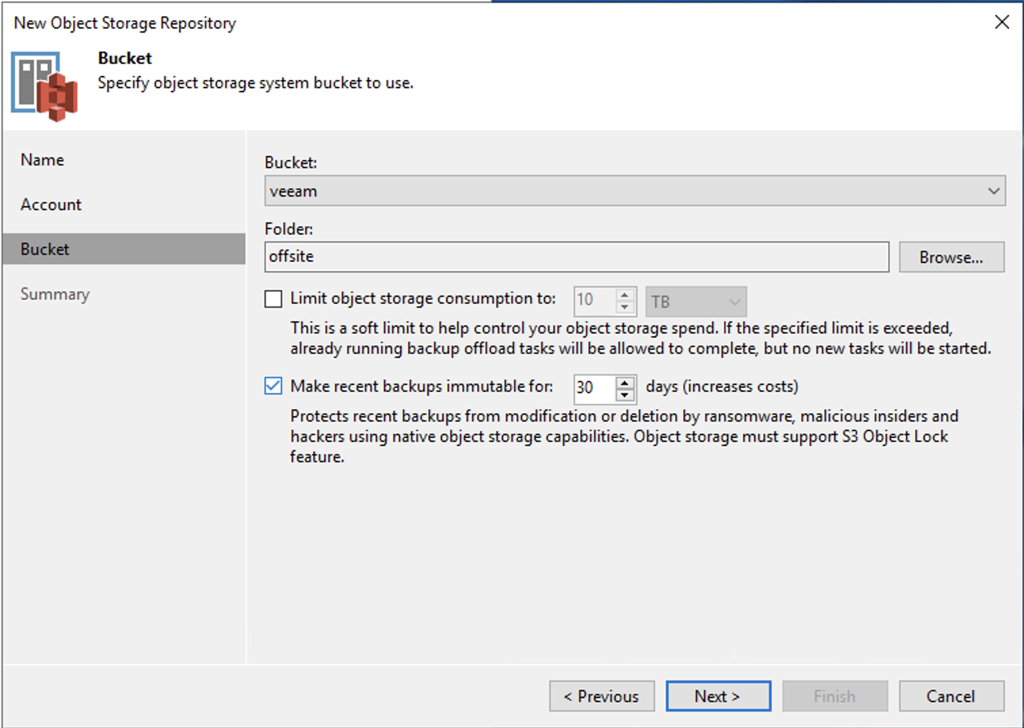
mc mb minioveeam/veeam --with-lock --insecure
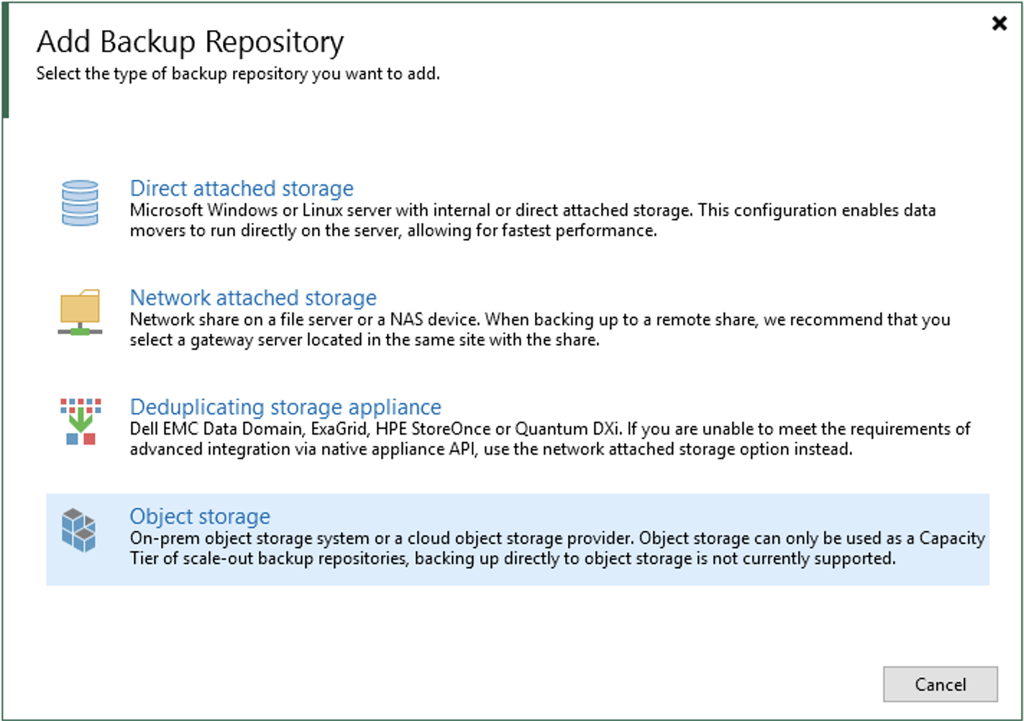
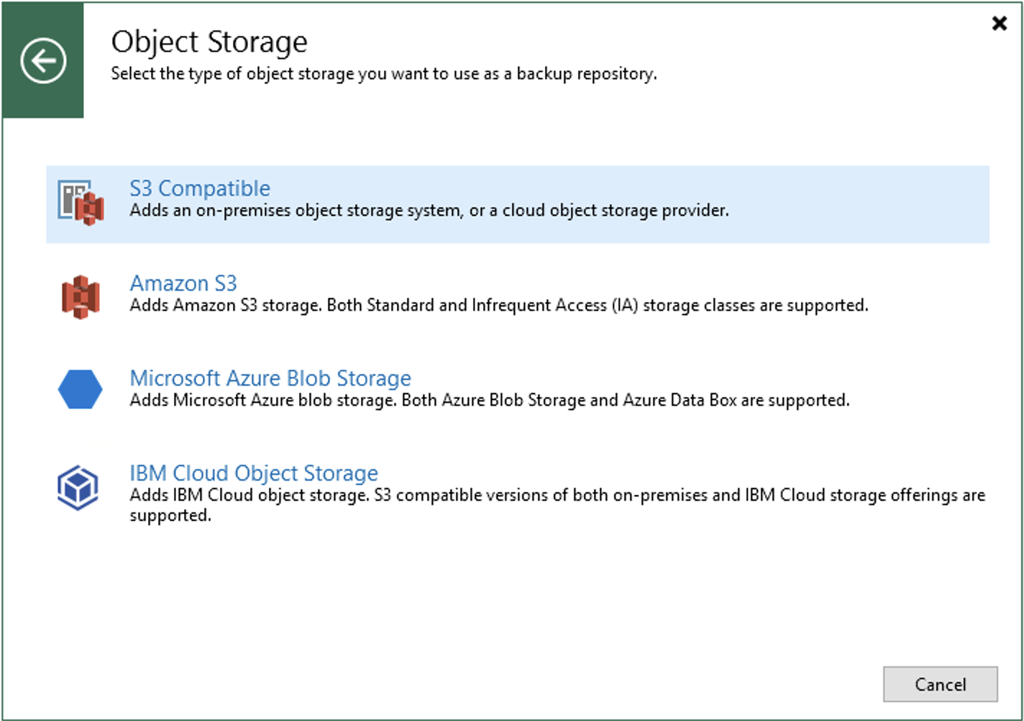
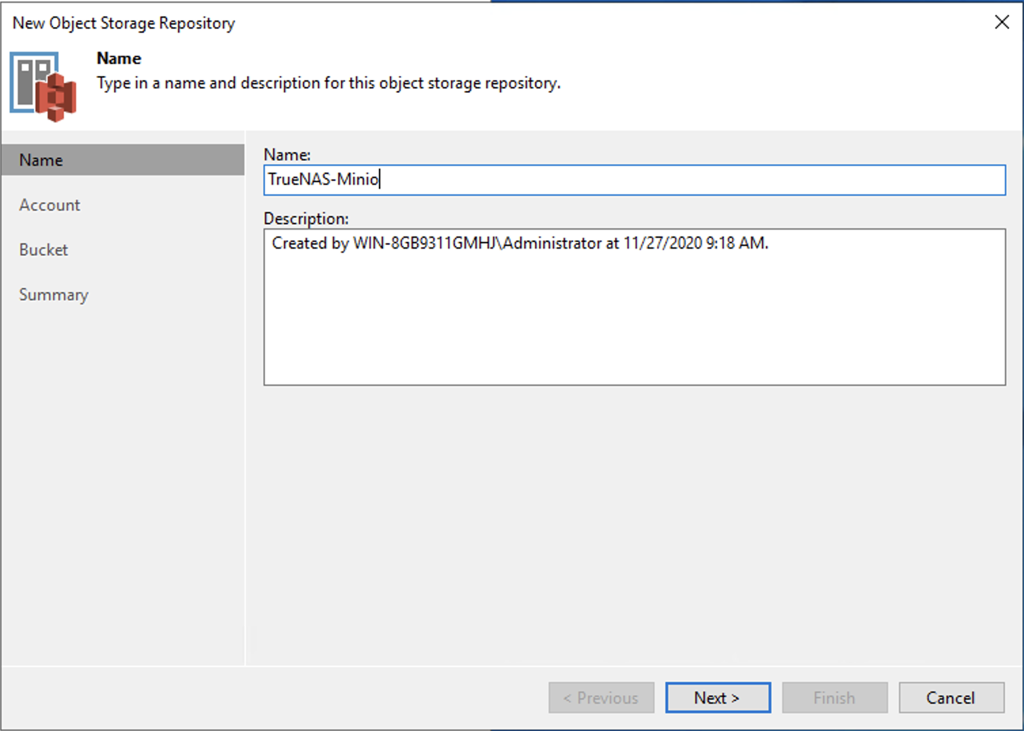
Veeam
Now it’s just a matter of following the wizard in Veeam for adding a cloud tier repository and ensuring that the option for object lock is enabled with an appropriate retention period. In the wizard it will require you fill in something in the region field, but that isn’t used by MinIO so you have put in whatever you like there.